
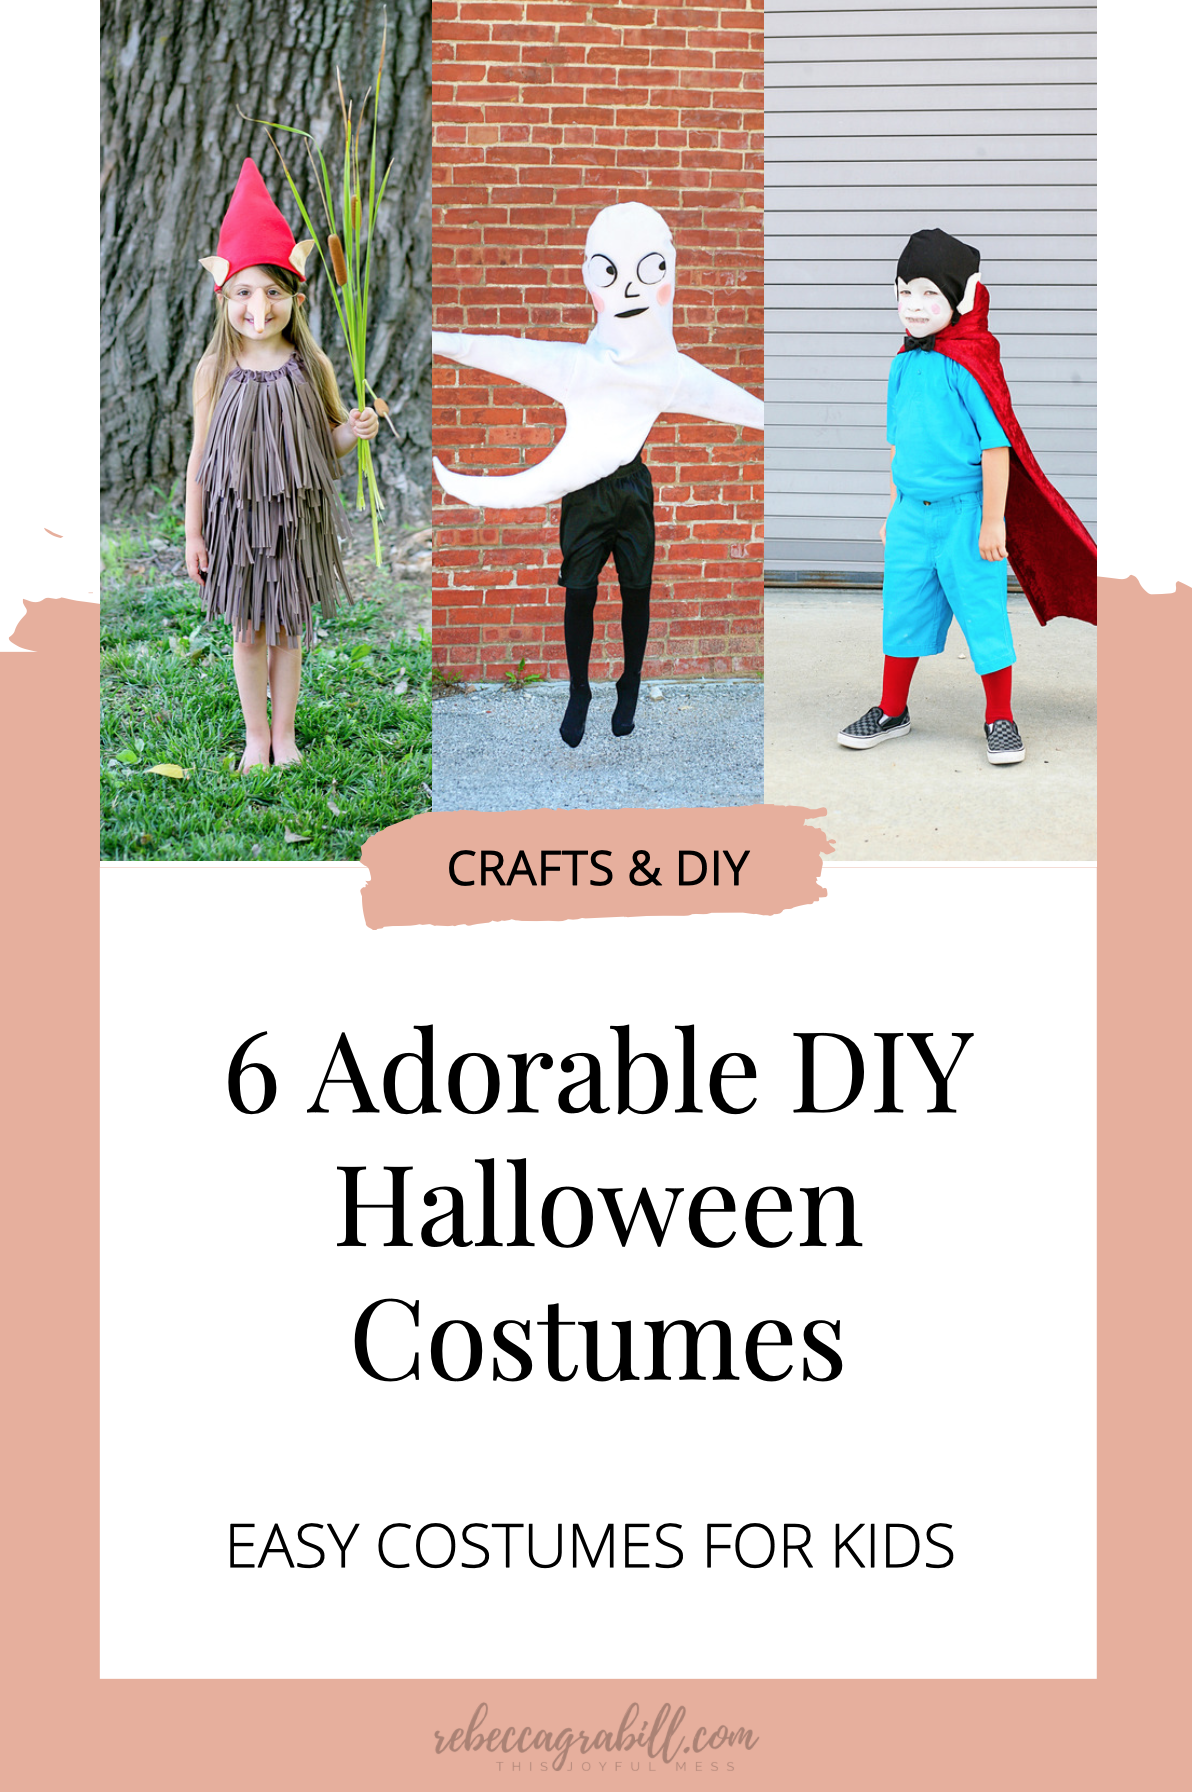
6 Adorable and Easy DIY Halloween Costumes for Kids
Picture it: I’m days from Halloween, no costume in mind. Pinterest is bringing up the same old ideas. Either too mundane (what, another princess?), or far, far too complicated (I need a jigsaw and epoxy and a double boiler and fifteen pounds of jelly beans?). I need something simple. Something fast. Something that doesn’t require a degree from ISCU (I’m So Crafty University).
I turn away from my tablet and pick up a book. The book just happens to be Halloween Good Night, a recent release from Atheneum Books, and within the pages … inspiration.
Below you’ll find instructions for six of the cutest, most unique, and best of all—easiest—DIY Halloween costumes on the internet, all designed by my good friend and amazing photographer/designer, Jennifer Mazi. All you’ll need are a glue gun, a few supplies, and about sixty minutes, tops. Are you ready to have the cutest goblin on the block?

About Halloween Good Night
Imagine Halloween night after you’ve done your trick-or-treating, sorted and catalogued your candy. You’re in bed, waiting, wondering: What are the real monsters doing right now? How do monsters celebrate Halloween? What if they’re creeping through the streets, lurching across town, on their way … to your door?
This rhythmic, rhyming counting book is full of surprises and gentle sweetness as the reader (like Max with the Wild Things!) masters her monsters and tucks her fears in to bed with a kiss and a Trick or Treat wish.
The Costumes
Wood Imp
Materials:
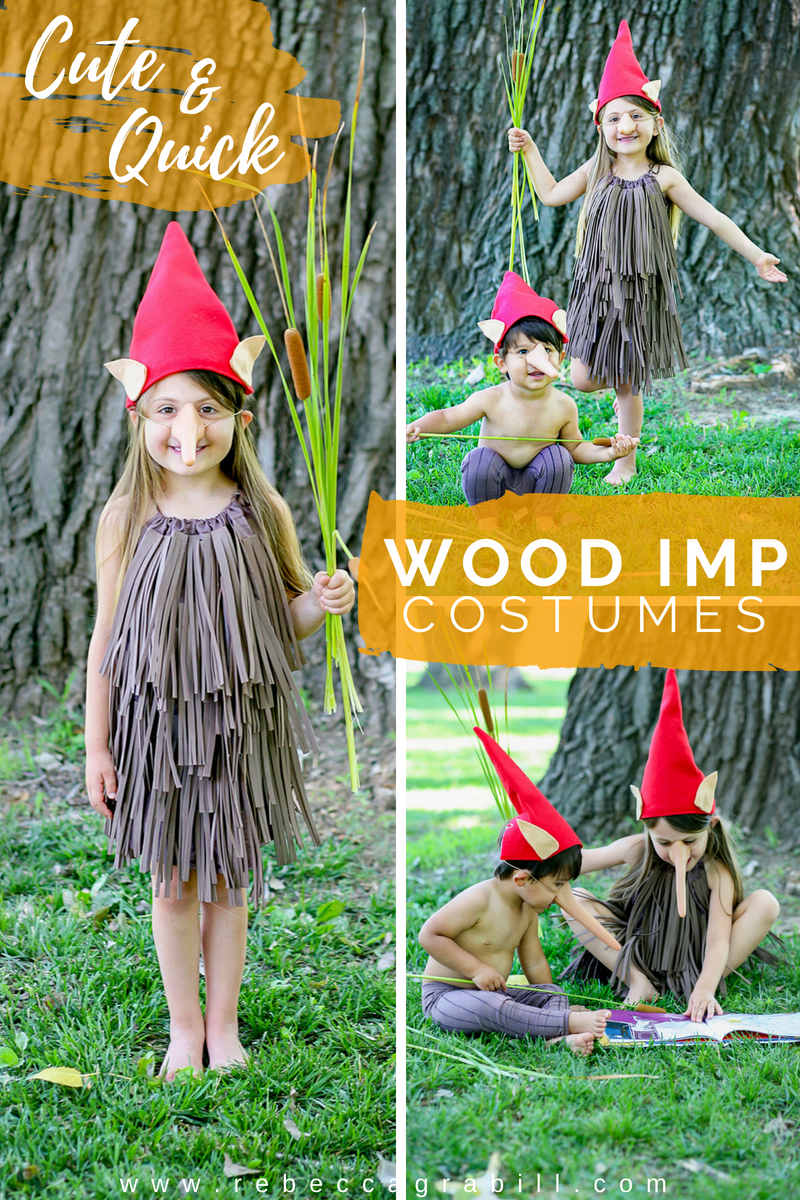
- 10 pieces of brown foam paper
- Twine or jute
- Pillow case or plain sundress (brown or white dyed brown)
- Brown fabric dye (optional)
- Hot glue
- Pinnochio nose
- 1⁄2 yard of red felt
- 1⁄2 yard of medium weight fusible interface
- 1 sheet of tan felt
Instructions:
- Hat: Cut out two triangular pieces from the red felt, using the measurements of your child’s head to determine size—measure all the way around your child’s head, divide the number in half, and add an inch for 1/2-inch seams. This is your triangle’s base. Make the rest as tall as you’d like!
- Cute out two pieces of interface a bit smaller than the hat pieces.
- Glue or iron (if fusible) interfacing onto the triangles before gluing the hat together. This allows the hat to stand up.
- Cut out pointy ear shapes from the tan felt and affix to either side of the hat.
- Dress: Make a pillowcase dress using hot glue or iron-on no-sew adhesive to finish the seams. Or, hit up the thrift store for a white sundress you can dye.
- Cut paper foam into one-inch strips, then make three cuts almost all the way to the top of each strip.
- Use hot glue gun to affix paper foam to the dress.
Ghost

Materials:
- 3 yards of fleece or felt
- Batting
- Black, white and pink felt for the face
- Black mesh fabric for mouth, which doubles as eyeholes
- Black pants and shoes
- Optional: Glow-in-the-dark paint
Construction time: 60 minutes
Instructions:
- Cut out two layers of the ghost shape, allowing for ghost head to come up about a foot higher than your child’s head. Cut out four layers of arms, two for each side.
- Cut white eyeballs and black pupils, black eyelashes and pink circles for cheeks out of felt.
- Glue or sew face to ghost. Once you can determine where your child’s eyes will be, cut out a small mouth roughly in that location. You can leave the mouth hole open, or cover with thin black mesh.
- Glue around the edges of the ghost layers.
- Cut a horizontal slit in the back of the costume roughly in line with the arm holes to allow your child to slip the costume up and over his head, placing arms into the sleeves.
- Optional: paint with glow-in-the dark paint for spooky nighttime fun.
Goblin
Materials:
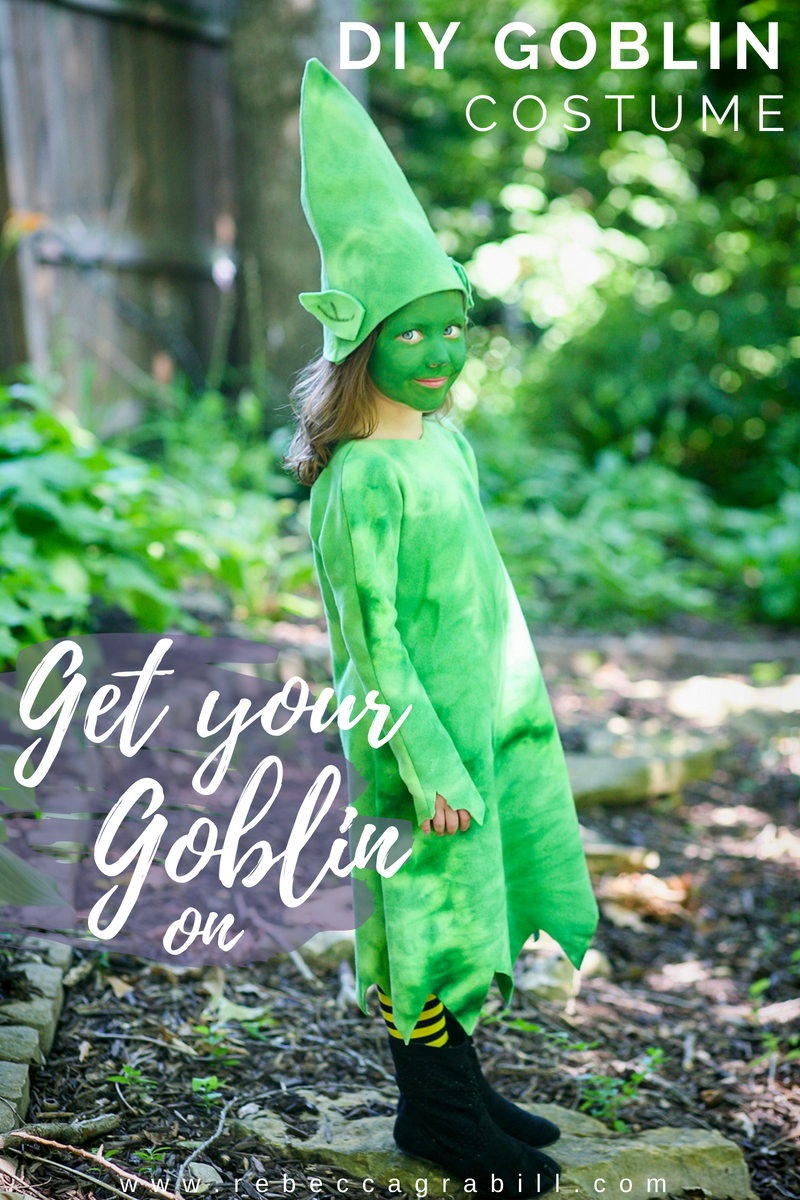
- 3 yards of green fleece
- 1 sheet of green felt
- Black and yellow bumblebee tights
- Vampire teeth
- Green face paint (optional)
- Hot glue, or no-sew iron-on adhesive
Construction time: 1 hour
Instructions:
- Hat: Cut out two triangular pieces of green felt, using the measurements of your child’s head to determine size.
- Cute out two pieces of facing a bit smaller than the hat pieces.
- Glue or sew facing onto the triangles before gluing or sewing the hat together. This allows the hat to stand straight up.
- Cut out pointy ear shapes from the tan felt and affix to either side of the hat. Tunic: Trace around child’s body onto green fleece. From there, add two inches and cut out two panels for dress.
- Join panels together along the sides with adhesive of choice. Turn dress so seams are on the inside.
- Cut jagged edges along the sleeves and hem of the dress.
Vampire
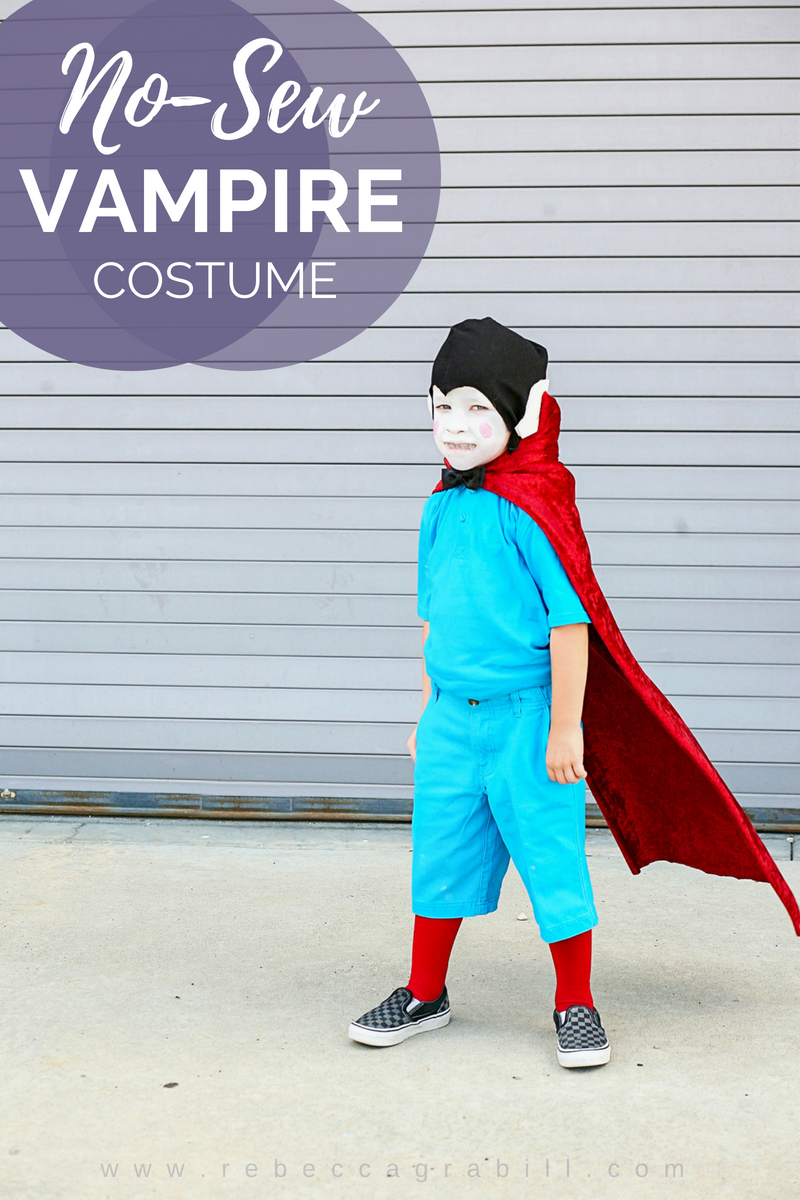
Materials:
- 2 yards of red fabric for cape
- Old cereal box and wire hanger
- Blue shirt and shorts
- Red knee socks
- Black bow tie
- Black and white fleece for head piece and ears
- White and pink face paint (optional)
- Vampire teeth
Construction time: 60 minutes
Instructions:
- Cape: Cut out two rectangles of red fabric eight inches shorter than the height of your child. Trim the top to into the shape of a collar.
- Sew or glue around all but one edge of the cape and turn so seams are on the inside.
- Using your cape collar as a guide, cut the cereal box into the shape of a tall collar and slip between the two panels. Trim a wire hanger to match the length, and glue along the top of the cereal box. This allows you to shape the collar and make it stand up.
- Affix the cape to the top shoulder seam of the shirt, or attach around neck with the bow tie.
- For the head piece: Measure the circumference of your child’s head.
- Measure all the way around your child’s head. Divide this number by half, and add one inch for seams. Cut two half-ovals, which will be facing sides of the Vampire “hair.” The bottom, straight edge of the half-ovals should be made to your measurement. The height of the ovals should be about 5”. Allow for the ends at the front to form a deep triangle. This will be a widow’s peak.
- Place hat pieces together, pin around the outer curved edge and use hot glue to finish, then turn so the seams are on the inside.
- Cut two pointed ears out of the white felt and affix to the outside of the hat.
- Optional: Paint face white and add pink cheeks.
Witch
Materials:

- 3 yards of purple fleece (or find a purple witchy dress at a thrift store!)
- Black and yellow bumblebee tights
- 1 yard of purple felt or fabric
- Yellow ribbon
- White and pink face paint (optional)
Construction time: 60 minutes
Instructions:
- Hat: Cut out two triangular pieces of purple felt, using the measurements of your child’s head to determine size.
- Cut out two pieces of facing a bit smaller than the hat pieces.
- Glue or sew facing onto the triangles before gluing or sewing the hat together. This allows the hat to stand up.
- Cut a wide, circle brim for the hat, and sew or glue the brim in place. Finish with a yellow ribbon.
- Dress: Trace child’s torso onto purple fabric. Add about two inches all the way around and cut out two panels for the dress.
- Attach front panel to back panel with your adhesive of choice. Turn the dress so seams are on the inside.
- For broom, gather 20 small sticks and 1 long branch. With the long stick in the middle, wrap jute around the bunch of sticks, about two inches away from the end of the small sticks. Use hot glue to anchor the jute.
- Optional: Paint face white and add pink cheeks.
Mummy

Materials:
- One queen-sized white sheet (thrift store!)
- Black, white and pink felt for the face
- White full body suit or white shirt and leggings and white mesh fabric
- Glue gun
Construction time: Less than 30 minutes
Instructions:
- Cut from felt: white eyeballs and black pupils, black eyelashes and pink circles for cheeks.
- Glue or sew felt face around where your child’s actual face will be, so she can see out of the full body suit. Or attach face to mesh fabric.
- Tear white sheet into two-inch strips.
- Wrap strips around torso, shoulders and thighs first to provide you anchors around which you can knot other strips for limbs.
- Position body suit or mesh face so your child can see clearly between strips.
So, which costume do you like the best? When you get your Make on, be sure to tag #HalloweenGoodNight on social media. I'd love to see your creativity in action! And don't forget to pick up your own copy of Halloween Good Night!


Whether for cuteness or story, enjoy the free wallpapers I’ve created featuring some of Ella’s images. And while you’re at it, why not read the book!